
MapConductor の MapTiler 用 React Native プロバイダーです。Web 用の
@mapconductor/react-for-maptiler とは別パッケージで、Android の
com.mapconductor:for-maptiler と iOS の MapConductorForMapTiler を薄くラップします。
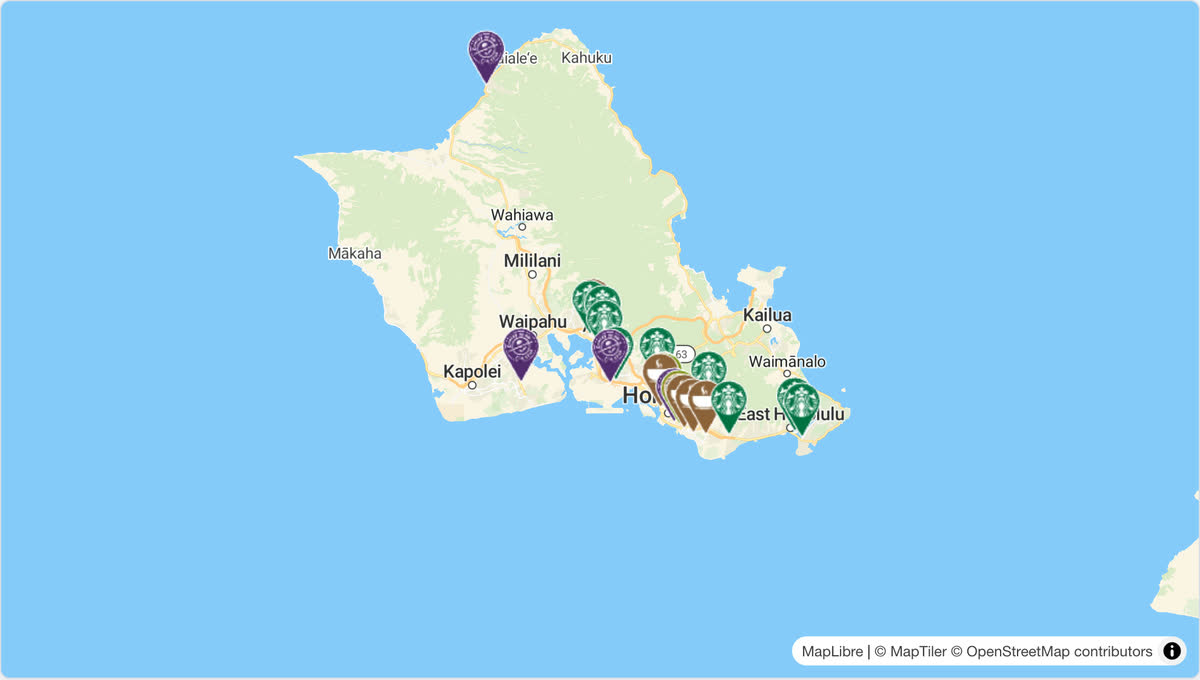
画像は Web 版(@mapconductor/react-for-maptiler)のライブデモです。同じ店舗マップを React Native で書くと次のとおりです。
import { useMemo, useState } from 'react';
import { Text } from 'react-native';
import {
  createGeoPoint,
  createMapCameraPosition,
  createMarkerState,
  type MarkerState,
} from '@mapconductor/js-sdk-core';
import { InfoBubble, Markers } from '@mapconductor/js-sdk-react/native';
import { MapTilerDesign, MapTilerMapView, useMapTilerViewState } from '@mapconductor/reactnative-for-maptiler';

const STORES = [
  { id: 'waikiki', name: 'Waikiki', latitude: 21.2793, longitude: -157.8292 },
  { id: 'kailua', name: 'Kailua', latitude: 21.3972, longitude: -157.7394 },
  { id: 'haleiwa', name: 'Haleiwa', latitude: 21.5928, longitude: -158.1034 },
];

const INITIAL_CAMERA = createMapCameraPosition({
  position: createGeoPoint({ latitude: 21.38, longitude: -157.93 }),
  zoom: 10,
});

export function StoreMap() {
  const mapViewState = useMapTilerViewState({
    mapDesignType: MapTilerDesign.Streets,
    cameraPosition: INITIAL_CAMERA,
  });
  const [selected, setSelected] = useState<MarkerState | null>(null);
  const markers = useMemo(
    () =>
      STORES.map(store =>
        createMarkerState({
          id: store.id,
          position: createGeoPoint({ latitude: store.latitude, longitude: store.longitude }),
          extra: store,
          onClick: marker => setSelected(marker),
        }),
      ),
    [],
  );

  return (
    <MapTilerMapView state={mapViewState} style={{ flex: 1 }} onMapClick={() => setSelected(null)}>
      <Markers states={markers} />
      {selected && (
        <InfoBubble marker={selected}>
          <Text>{(selected.extra as (typeof STORES)[number]).name}</Text>
        </InfoBubble>
      )}
    </MapTilerMapView>
  );
}import {
MapTilerDesign,
MapTilerMapView,
useMapTilerViewState,
} from '@mapconductor/reactnative-for-maptiler';
export function MapPage() {
const state = useMapTilerViewState({
id: 'main-map',
mapDesignType: MapTilerDesign.Streets,
});
return <MapTilerMapView state={state} style={{ flex: 1 }} />;
}通常のオーバーレイは @mapconductor/js-sdk-react の Marker、Markers、
Polyline、Polygon、Circle、GroundImage、RasterLayer を子として宣言します。
大量のマーカーには、1 マーカーごとの React effect を作らない Markers を使用してください。
このプロバイダは 2 つのプラットフォームで別の地図エンジンを使います。
| 実体 | マーカーの描き方 | 同期投影 | |
|---|---|---|---|
| Android | MapTiler 独自の WebView SDK(com.maptiler.maptilersdk、中身は MapLibre GL JS) |
Compose のオーバーレイ(MapTilerProjectedAnnotation) |
SDK に無い。コアの WebMercatorScreenProjection で埋めている |
| iOS | MapLibre ネイティブ(MLNMapView)に MapTiler のスタイル URL を差す |
MapLibre のシンボルレイヤ | MapLibre の convert |
prop も振る舞いも揃えてありますが、片方で通ったからもう片方も通るとは限りません。 変更したら必ず両方の実機で確かめてください。
- Android: MavenLocal の
com.mapconductor:for-maptiler:1.2.0が必要です。 API キーは application manifest のMAPTILER_API_KEYmeta-data へ設定します。 - iOS:
MapConductorForMapTilerを CocoaPods で解決します(MapLibreはその podspec のs.dependencyから降ります)。API キーは Info.plist のMapTilerAPIKeyへ設定します。
キーは環境変数、Gradle property、または git 管理外の設定ファイルから注入し、
リポジトリへコミットしないでください。iOS 側は値に $(...) が残っていれば
展開されなかったビルド設定のプレースホルダとして弾きます(MapTilerMapHost.resolveApiKey)。
弾かれないと地図が真っ白になるだけで理由が出ません。
npm run build --workspace @mapconductor/reactnative-for-maptiler

# android-for-maptiler を変更したら publishToMavenLocal が必須
env JAVA_HOME="/Applications/Android Studio.app/Contents/jbr/Contents/Home" \
  ./gradlew :android-for-maptiler:publishToMavenLocal
デザイン ID は getValue()(mapDesign_id=...,style=...)ではなく id そのものを
ネイティブへ送り、android / iOS とも MapTilerDesign.fromId で引きます。
web の形式を送るとどのデザインにも一致せず、黙って Streets のままになります。
クリックのカスケードと座標投影は各ネイティブドライバー側の責務です。 RN 層で別の当たり判定や投影を書かないでください。